|
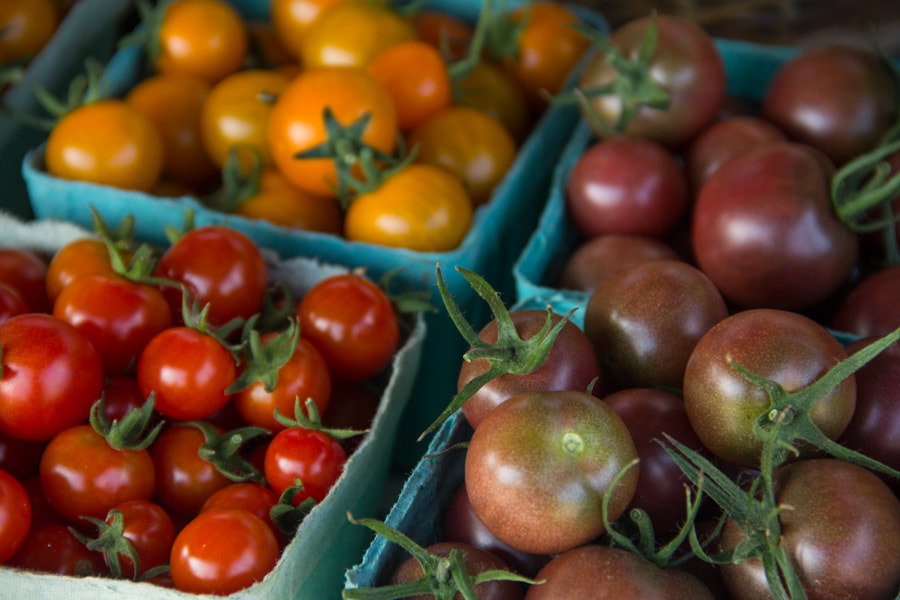
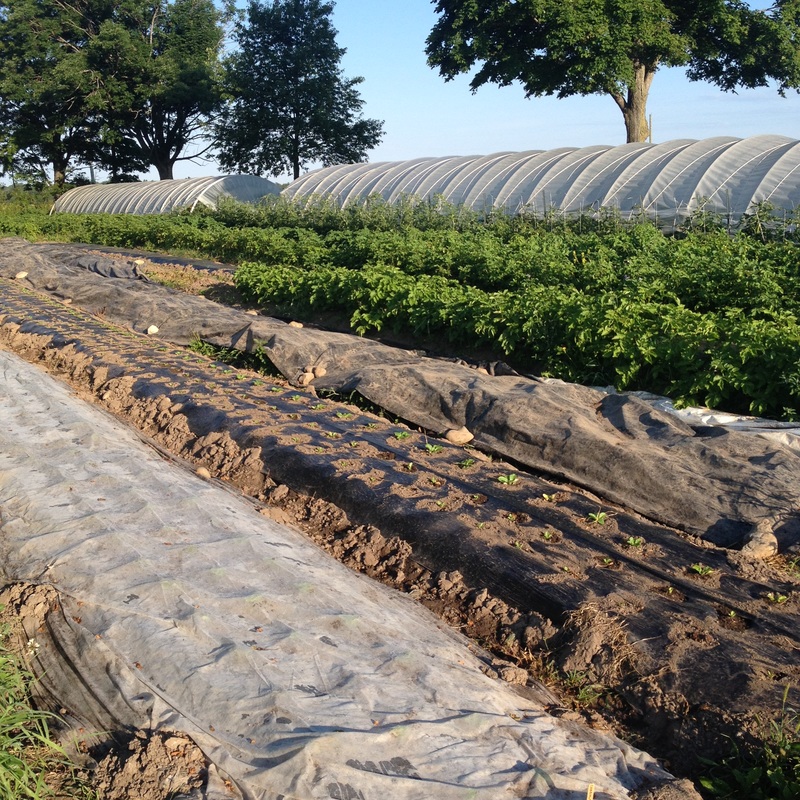
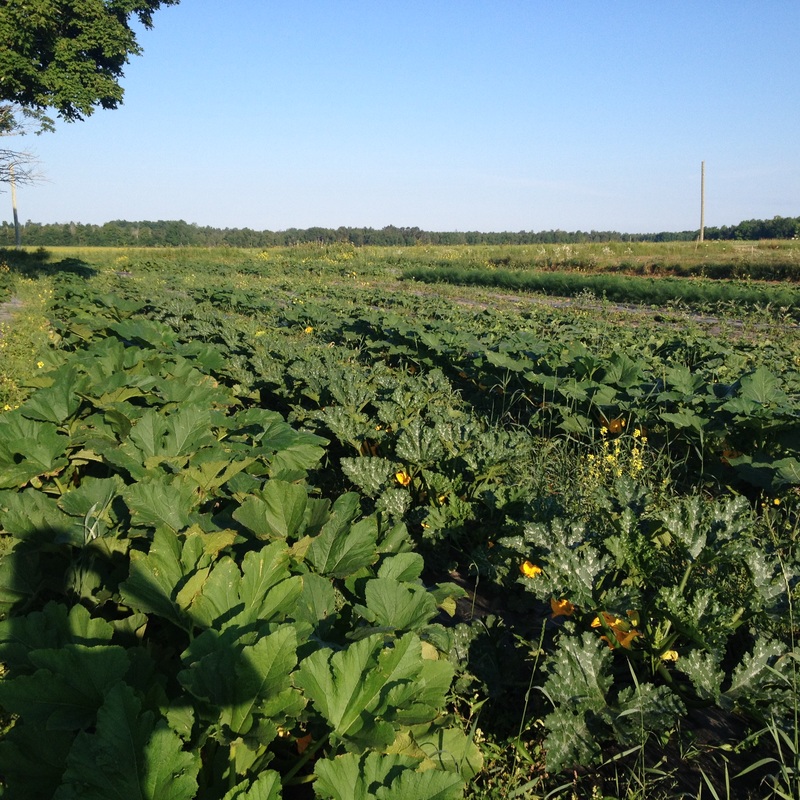
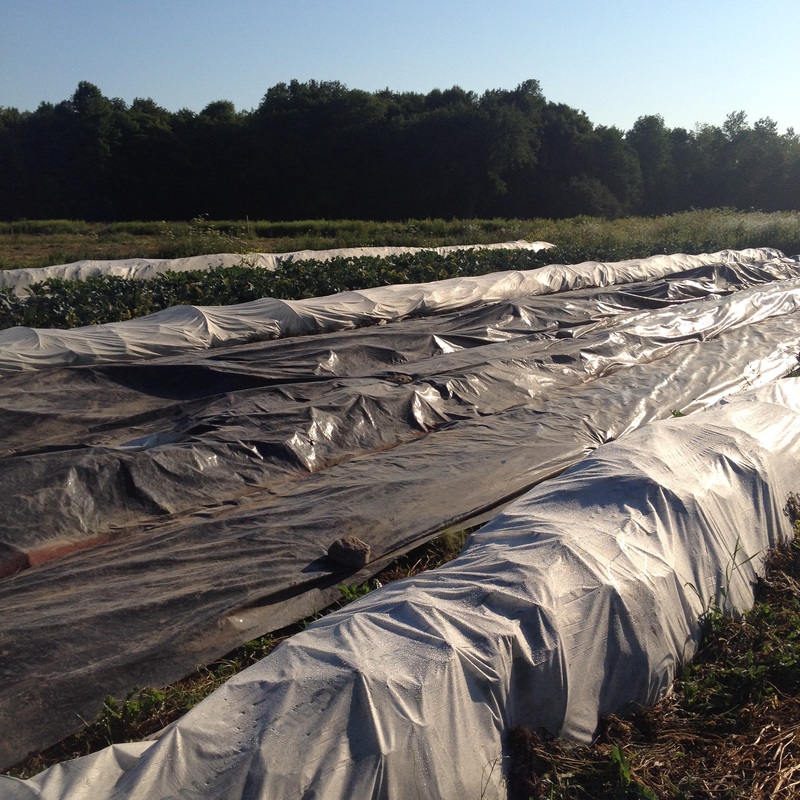
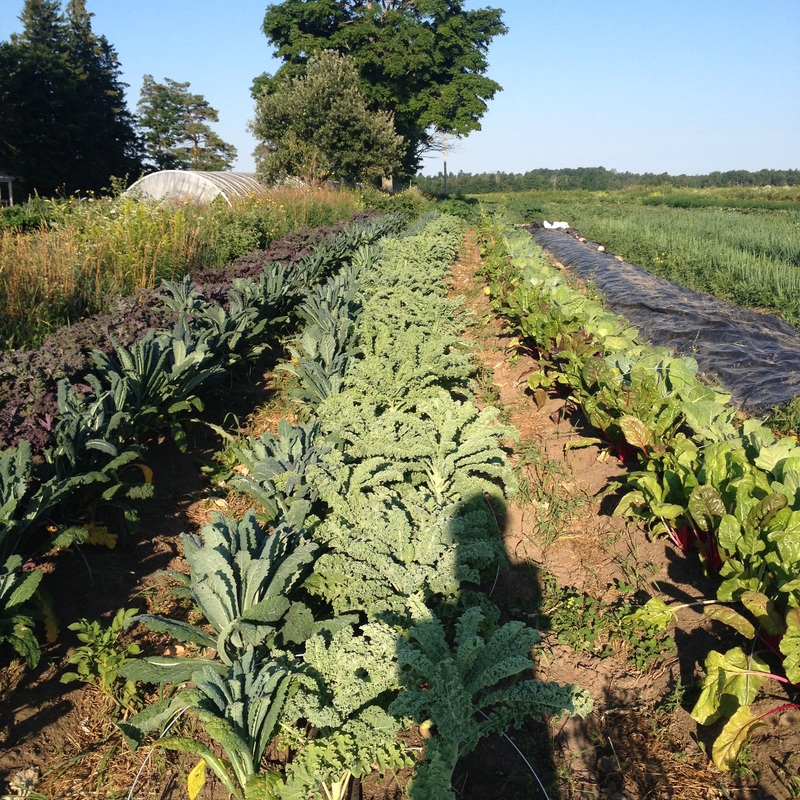
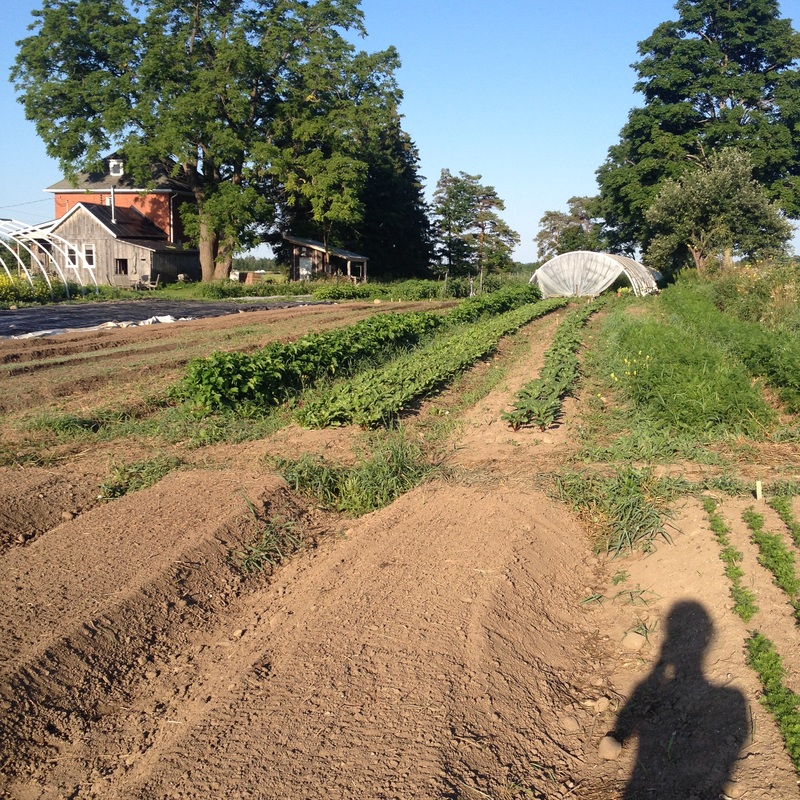
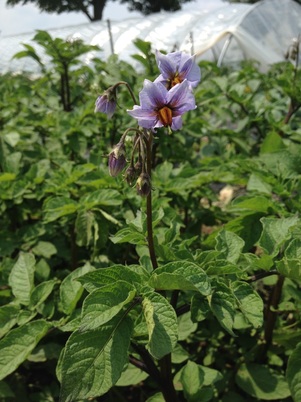
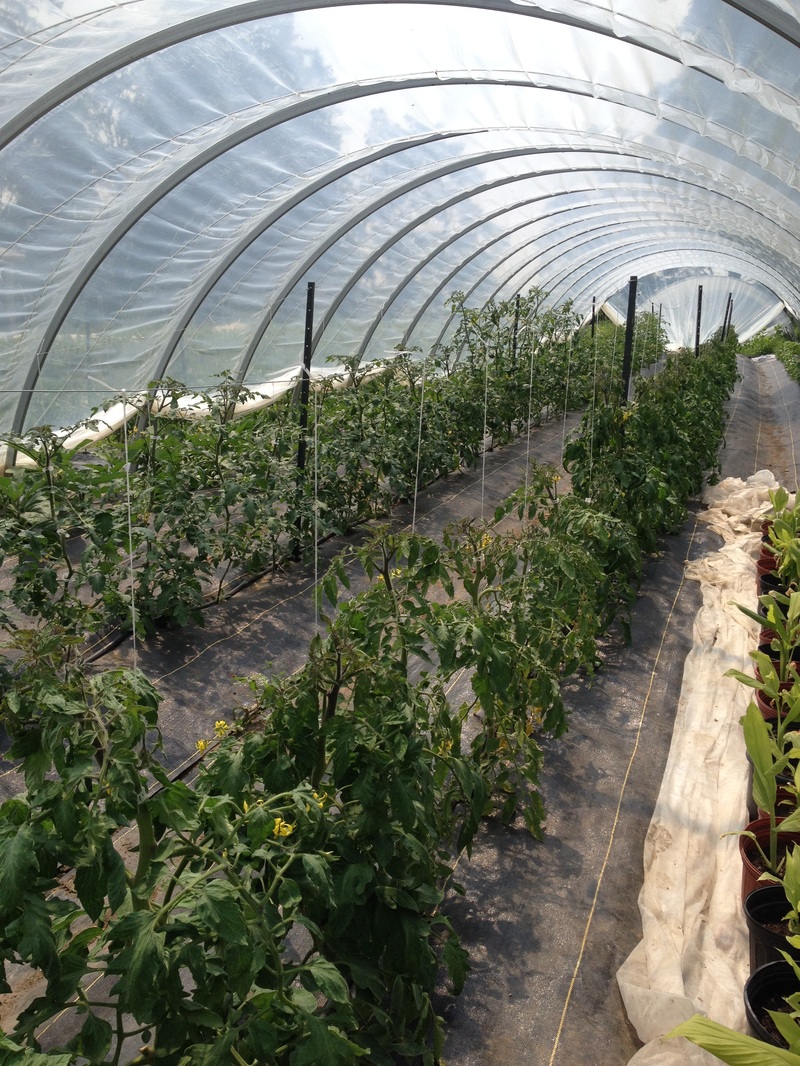
We have heat! A week of hot days in July is always a good sign for the farming season as it ensures that all heat loving crops (such as tomatoes, peppers, eggplant, and cucumbers) and long-season crops (winter squash, sweet potatoes, and onions) get the boost they need to be productive. One of the major tasks we will be completing this week is the garlic harvest! We will dig all the mature garlic bulbs and hang to dry for several weeks. By the end of August we will all be enjoying our cured garlic! Since many of you will not be able to visit our farm during this growing season, I thought I would use this post to show you some features around our farm and the methods we use for growing your vegetables. These pictures will focus on the market garden itself - in a later post I will give you a tour of the animal and tree nursery components of the farm. Our market garden covers approximately 1.5 acres of our 10 acres property and is divided into 4 roughly equal section. Each section contains approximately 30 raised beds and each bed is 30 inches wide by 100 feet long. We groups all vegetables based on their family and each family gets planted in one section. In one section we have the nightshades (tomatoes, peppers, eggplant, and potatoes). Another section will have all the curcubits (melons, squash, cucumbers). In the third section we have both the brassica family (cabbage, kale, broccoli, kohlrabi, cauliflower, and many more) and the allium family (onions and garlic). The final section has root crops (carrots, beets, parsnips) and the spring peas. Each year, we rotate the location of each family, so that they are not back in the same spot until year 5. The two primary reasons for crop rotation are to rest and rebuild the soil between demanding crops and to prevent pest and disease buildup of specific crops in one area. Any crop that we grow for it's fruit is a heavy-feeder which will quickly deplete the soil if grown in the same area. Crops that are grown for their leaves or roots are lighter feeders so they require less from the soil.The only crop we don't rotate is our lettuces. One section of our field is partly shady so the lettuces stay in this area. We grow a few crops that don't fit into these family groups and we squeeze them in where there is space. These include: herbs, artichokes, okra, sweet potatoes, and beans. If you are interested in learning more about how I decided which crops to grow, when to plant them, in what quantities, and what to include in each weekly share, then check out my post from last year that has all the details! Just click on the pictures in the gallery to read the detailed description.
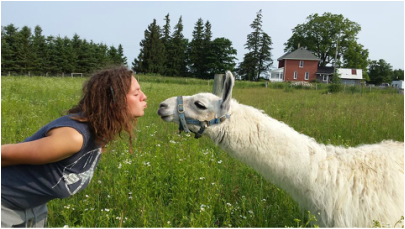 Salutations share members :) Time to meet intern number 2, aka me! My name is Kim, friends call me Kimmy. I come from our province's beautiful capital, Ottawa and I'll be staying here at Terra Verde right through the growing season until the end of October (that's 6 months of veggie garden learning madness!) This week I am very glad to be back on the farm as the previous week I took a trip home, I had fun checking out the markets and various gardens (the local/organic food movement in Ottawa is very hip and mainstream nowadays) however, the city is no place for a country girl and I actually couldn't wait to be back at Terra Verde. As soon as I could, I beelined it to the field to see the progress and oh boy was I pleased! Little tiny baby vegetables everywhere I looked! Peppers, eggplants, TOMATOES, zucchini, cucumber.... there is some deliciousness coming your way folks, but good things come to those who wait, and wait we shall for they are not ready, yet :) Of course there was a time when I was not at all thrilled about vegetables or entranced by their various growing stages. Coming from a back round of dairy farmers, I grew up on the standard meat and potato diet, only problem was I didn't like meat, so it was more of a potato diet for me haha. The family trips to the farm filled my childhood with wonder and happiness, fresh milk straight from the cow, welcoming new calves into the world, the barn kittens, the fresh air accompanied by that irreplaceable country smell... yep it was the good life. Except one thing, where on earth were all the vegetables?! As I grew older, I realized as fond as I was of my family's farm, there was definitely something missing. Slowly I started to learn about and integrate a more plant based diet in my life. Then came a huge break through, while working at a health food store, I was introduced into the world of CSA's. I completed my first organic veggie farm internship in 2013 on a lovely farm in St. Albert, Ontario and I've never looked back since. I took a summer off farming to explore a sustainable building/living internship in Argentina at a center called "Mama Roja", I knew I wanted to farm again in summer 2015 so when I stumbled upon Terra Verde, after my recent trip down south it just fit! Plus they have goats here, I love goats :) I used to say it was my dream to have my own farm, but now I say it is my goal and I'm 100% serious about making it happen. Everyday here at Terra Verde I reminded of the importance of food and community, I get to see and experience first hand all the love, optimism, hard work and hard ships that goes into such an operation and it is continuously inspiring to me. I am so grateful to be apart of the Terra Verde team this season as well as being equally thrilled to provide you all with these delicious and nutritious vegetables. A lot of dedication goes into this and seeing the happy members and hearing their positive comments puts a cherry on top of my experience here. Weekly Share Contents: Head Lettuce Carrots Broccoli Baby Potatoes Green Onions Zucchini Cabbage Recipe Ideas:
This weeks showcased veggie is the humble cabbage! Cabbage is a wonderfully versatile vegetable; raw, roasted, sauteed, fermented, slice it up and you can throw it in just about anything!!! I like my cabbage roasted, which can easily be done on the grill for any of you BBQ lovers! Just cut your cabbage is wedges, brush with oil (remember to use an oil which can stand the heat, try avocado or sunflower) and grill for 5-7 minutes flip and grill 5-7 minutes longer, enjoy just like that or toss with a dash of some of your favorite dressing. Alternatively, you can roast in the oven. Preheat to 450, remove the core and cut into wedges, drizzle with oil and sprinkle on a pinch of salt and pepper, cover your pan with foil and bake for 20 minutes, take off foil and bake for an additional 20-25 minutes, toss with 2-3 tablespoons balsamic vinegar and you got yourself and real nice cabbage side dish! Too hot for ovens and BBQs? We all know cabbage makes a great coleslaw so skip the cooking and eat it raw, shred it up with some carrots and onions (or any other coleslaw like ingredients you enjoy) and toss with your family's favorite go to coleslaw dressing, or try out this fabulous recipe: 3 tablespoons peanut butter (or almond) 3 tablespoons rice wine vinegar 1 tablespoon each soy sauce, sesame oil, olive oil 2 tablespoons freshly squeezed lemon juice Simply whisk together and toss with your shredded cabbage con other veggie mixture. It's also always nice just to keep it simple, add some sliced cabbage to any green salad and enjoy the different texture it brings. And no stir-fry is complete without a little cabbage right?! I like to keep the pieces quite long and thin so you can twirl it around your fork like spaghetti! Now for the real adventurous, why not try fermenting your cabbage? That's right folks make your very own sauerkraut! Fermented foods have long been praised for their health benefits, they promote flora in our tummies and help us digest and it's oh so easy to do! Basically all you need is cabbage, salt and a jar to put them in. Here's a link to a no fuss sauerkraut in a mason jar recipe http://www.thekitchn.com/how-to-make-easy-homemade-sauerkraut-in-a-mason-jar-cooking-lessons-from-the-kitchn-193124 I hope you all have a most excellent week, that's all folks! Kimmy signing off. 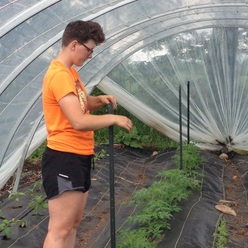 Greetings Veggie Lovers! This week, Lorraine has assigned me (Erin, the short season farm minion…I mean intern) the task of writing to you all. As an intern at Terra Verde, I’m here to help out and learn on the farm for 4 months of the growing season this year. Time here at the farm has been busy so far, but rich in learning and tasty farm food. It’s been lots of fun to help to grow the food you share members get to enjoy each week. I came to Terra Verde this spring after finishing my undergraduate studies at Trent University. At Trent I studied Environmental Studies and Indigenous Studies, and it was throughout my studies that I developed an interest in learning about sustainable food systems, especially urban agriculture. While at Trent, I volunteered and worked with a number of different campus and community organizations, and was always happiest when my volunteering, work, and studies focused on food: preparing it, preserving it, thinking about it, writing about it, helping others access it, teaching about it, and eating it. The one area I wasn’t able to explore in depth while in school was learning more about growing food, and so consequently it is with great delight that I am now at Terra Verde learning all about how to grow the most abundant, tasty, and nutrient-dense veggies possible! After my time at Terra Verde, I will be moving to Quebec City for the fall/winter to work as an English Language classroom assistant. My hope is to continue to learn more about farming next growing season, and then to eventually develop an urban farming project in backyards, schoolyards, and other available urban land in Guelph. Weekly Share Contents: Now, to the most important part of this post, what you can expect to see in your share this week: Head Lettuce Carrots Broccoli Peas Basil Green Onions Kale Garlic Scapes Recipe Ideas:
Kale is a vegetable that is part of the brassica family (cabbage, broccoli, etc.). Kale is high in beta-carotene, vitamin K, vitamin C, and rich in calcium, in addition to containing sulforaphane, a chemical with anti-cancer properties. At Terra Verde this season, we are growing three different kinds of kale: Dinosaur kale, red curly kale, and a classic green curly variety. They all have their own unique looks, textures, and flavours, try them all this season! Kale is a very versatile vegetable, and one of my favorites because it can last for quite a while in the fridge when stored in the coldest part of your fridge, in as airtight a bag/container as possible. I like to throw kale into smoothies, use it in salads (both leafy salads, and quinoa/grainy salads), sauté it with mushrooms to have with eggs for breakfast, or throw is in soups, stews, and casseroles. One of my favorite ways to use up kale quickly though is to make kale chips. Kale chips are made by tossing kale in oil, lightly salting them, and then baking them in the oven on low heat until they are crispy and oh so tasty! Very simple to make (usually only takes about 5mins of prep, and less than 10mins to bake). There are some tips on how to make perfect kale chips here: http://ohsheglows.com/2014/03/12/6-tips-for-flawless-kale-chips-all-dressed-kale-chips-recipe/ This week has been a particularly busy one with many family events, lots of sun to make the weeds grow, and potatoes that needed hilling. So I am going to leave this post to mostly pictures of some up and coming crops. In the next 2 weeks, you should start to see exciting additions to your CSA basket as we start to harvest broccoli, cabbage, carrots, baby potatoes, beans, and zucchini. Yeah! For this week, we finish off the early summer crops before they go to seed in the heat. For those of you that are wondering why there have been no peas, we have had a particularly bad crop this year. Poor germination, rogue chickens scratching up the seeds, and a VERY weedy plot has made the peas produce poorly. To make this up to the pea lovers, we are going to try a fall crop of peas this year and see how it goes. Hopefully we can enjoy some snap peas in a few months time.
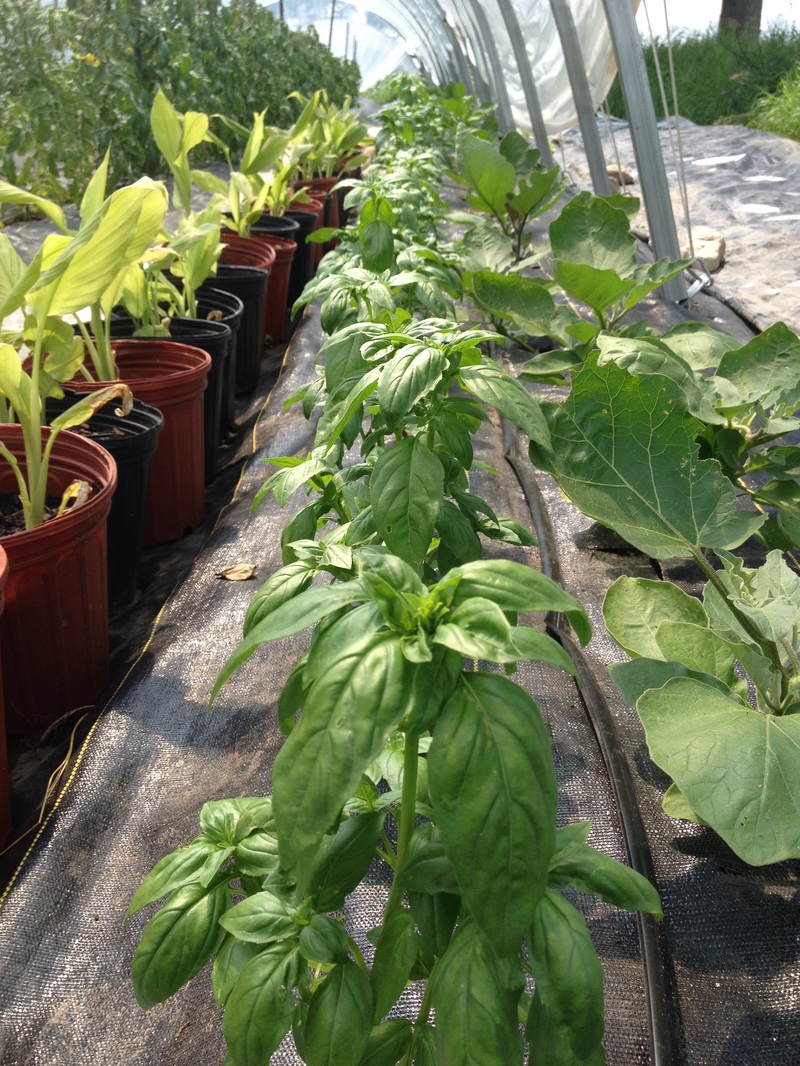 In the centre is the basil, doing beautifully. On the right are some eggplant and on the left are pots of turmeric. Rob started the turmeric from roots we had that started to sprout before we could use them. The turmeric can't be planted outside, but will be grown in pots for 10 months and then the roots harvested. Weekly Share Contents: Head Lettuce Turnip Kohlrabi Green Onions Swiss Chard / Collards Pea Shoots Garlic Scapes Bonus: Mixed Herbs |
Archives
February 2020
|

 RSS Feed